
One of the more common suspension parts to need replacement, in my experience, are sway bar links. Up here in New York, or in other states where rust is an issue, it isn’t always easy to loosen the nuts holding the sway bar links. Instead of the nut turning, the nut spins with the stud in the ball-and-socket in the end of the link. Some techs try to keep it from spinning with vise grips, but I’ve rounded off the teeth of enough of my vise grips to move over to the technique I’ll show in this post.
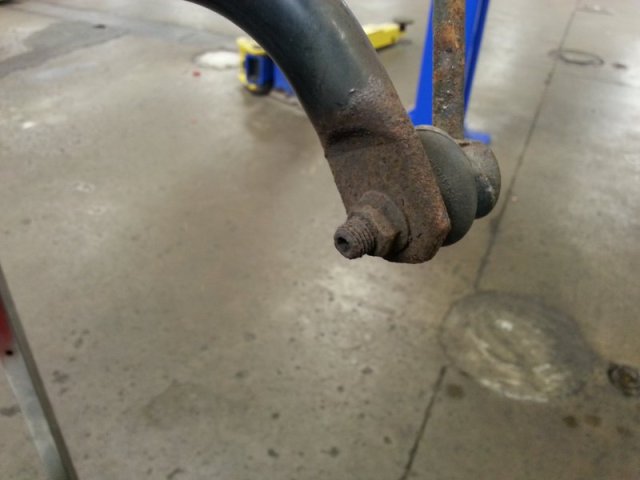
If it looks like this, it probably isn’t coming off without a fight, so here’s how I deal with it.
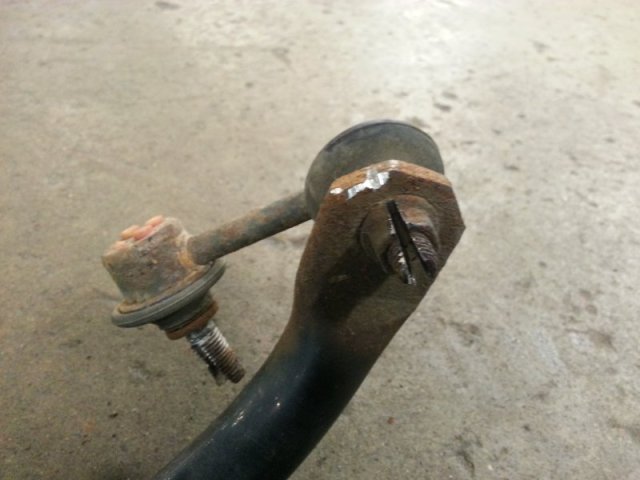
First I take my cutting wheel, and instead of trying to cut the nut and stud off, which does work in some locations, but not others, I cut straight in until I’ve cut pretty much entirely through the nut perpendicularly.
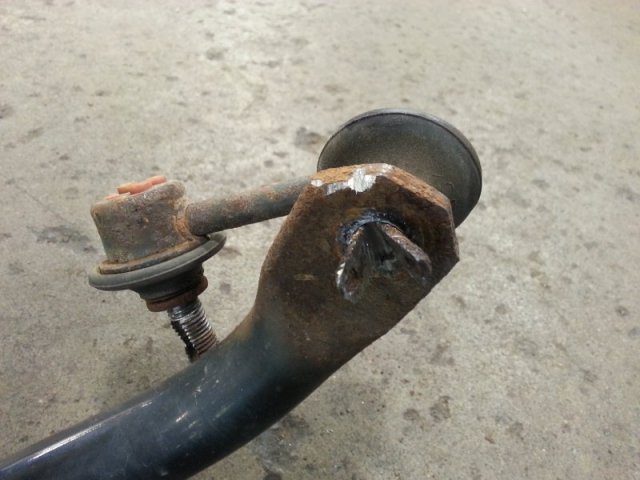
Then I use a chisel bit in my air hammer to split the nut off the stud.
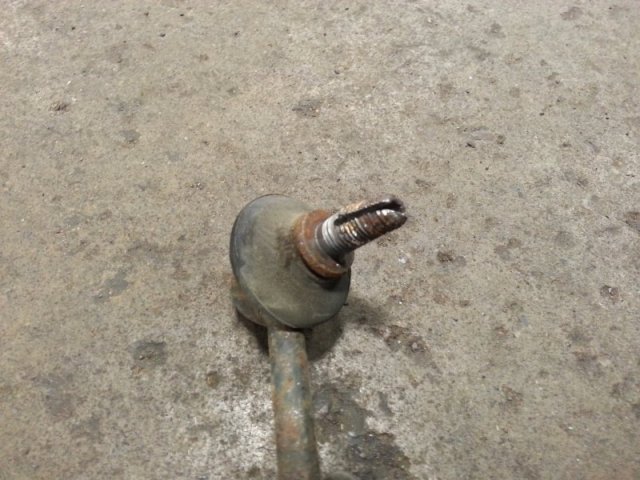
After that I just have to squeeze the split stud back together to allow it to slide out of the sway bar.
I’ve gotten some odd looks while doing it this way, but I can usually get the job done pretty quickly with less frustration and damage to my tools.
New blog posts every Monday and Thursday, plus pictures throughout the week on Facebook, Twitter, and Instagram!
Mechanical Malarkey stickers available for $5 anywhere in the US!
-Dan

Pingback: Quick Tip: Sway Bar Link Installation | Mechanical Malarkey