
Earlier in the summer I fixed a leak in my air conditioning system, only to have it start leaking from the evaporator, which is the part by your blower motor that cools the air in the car. I could tell it was leaking because I could smell the distinctive odor of refrigerant every time I started my car. Here’s step by step directions on how to change your evaporator, if you’re sure it’s leaking.

Based on my experience while doing this job, I would highly recommend buying an evaporator that comes with the expansion valve already installed. I think if you buy it from Honda it’ll come that way, but I went with aftermarket parts from RockAuto.
Also, unless your system has leaked out all of the refrigerant, you should to go to a shop to have them recover what’s left in the system, instead of releasing it into the environment, which is bad for the atmosphere.
Let’s start off with what tools you’ll need.

You’ll need:
- Flathead screwdriver
- Phillips screwdriver
- Ratchet (I used both 3/8 and 1/4 drive)
- 6 inch extension (I also used a 3 inch)
- 8mm socket
- 10mm socket
- 12mm socket
- Utility knife or razor blade
- 2 adjustable wrenches (if replacing the expansion valve yourself)
The first thing to do is disconnect the A/C lines going into the evaporator. To that, first remove the battery.
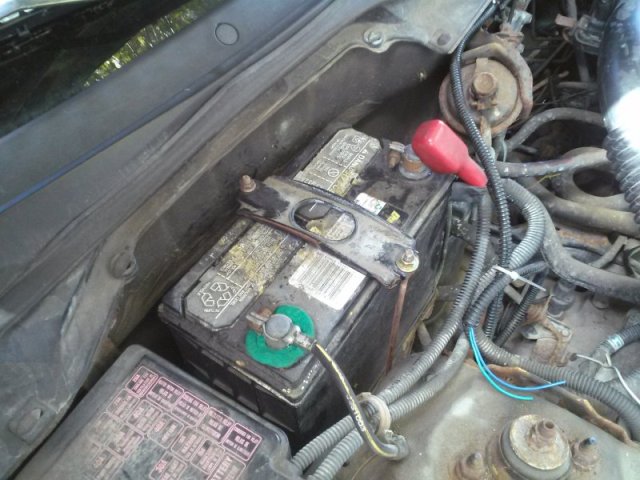
Behind the battery are the two connections.

Both of the bolts are 10mm. If you want to or need to replace them, they are 6 x 1.00 x 25mm bolts.

You can use a flathead screwdriver to help pull the connections apart.

You should replace the O-rings on these connections before putting it back together. It’s just a general good practice, to make sure nothing leaks.
Now for the work inside the car. First thing to do is empty your glove box, and then lower it down past its stops. Push in on each side of the glove box to make it move past the stops.
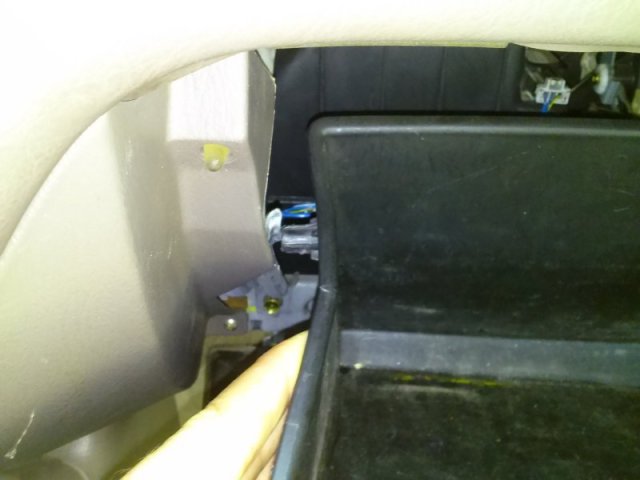
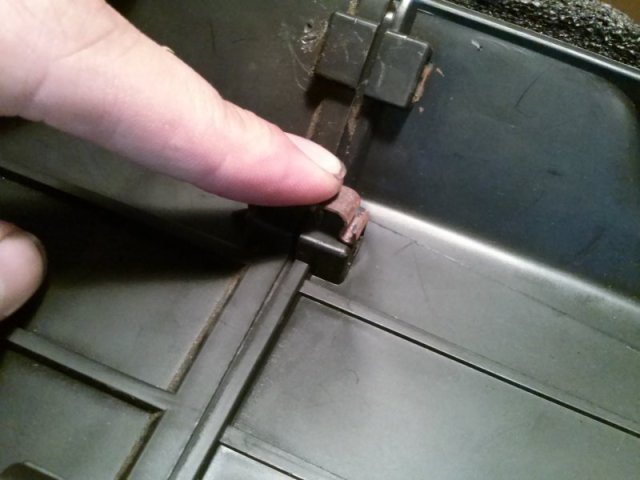
Remove the trim piece to the right of the glove box by pulling straight back.
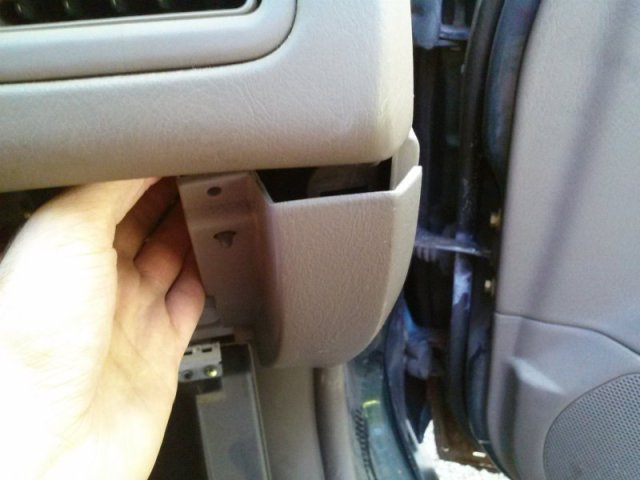
It may take a bit of force because it’s an older car and the clips may be a little rusty.

Loosen the trim under the radio and climate controls by removing 2 screws, one at the bottom, and one at the top.

Remove the right side metal brace. 12mm bolt on the top, 10mm bolt on the bottom.
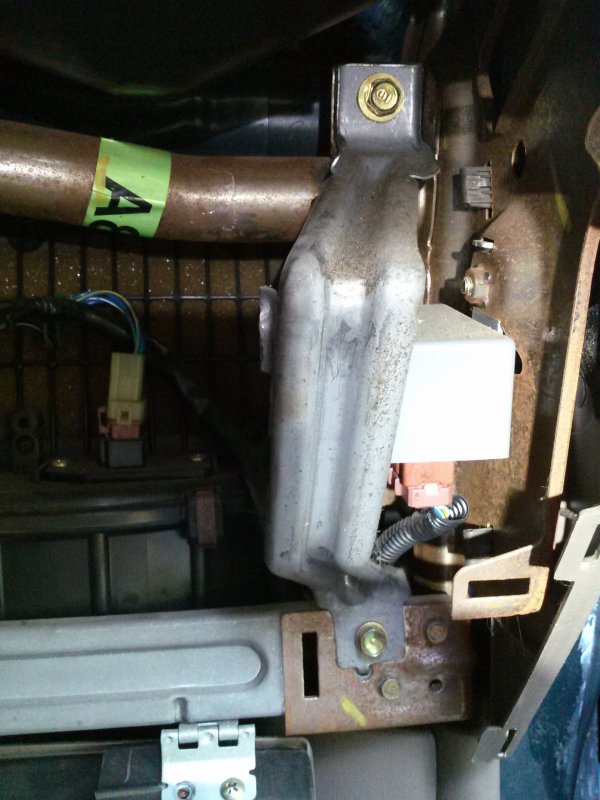
Remove the left side metal brace. 10mm nut on top, 10mm bolt on the bottom.
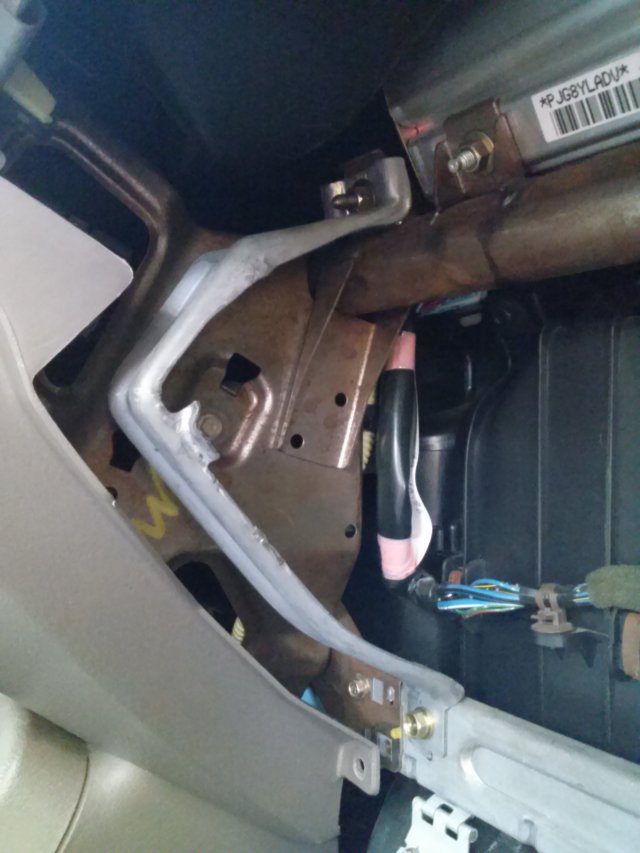
Remove the glove box frame. One 8mm bolt on the left, two 8mm bolts on the right.

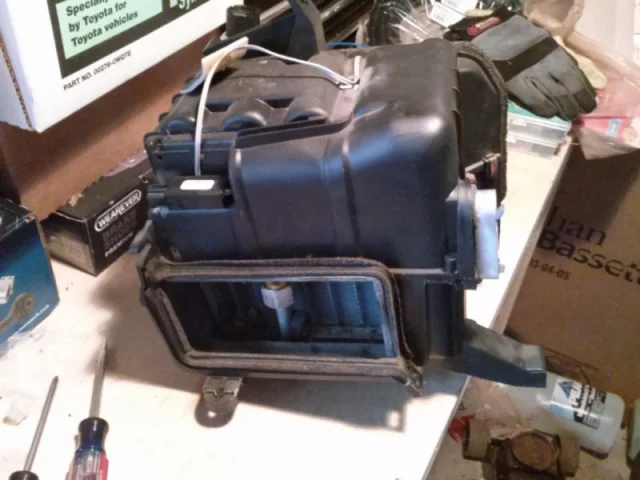
Now we have a clear view of the evaporator case on the left and the blower motor on the right.
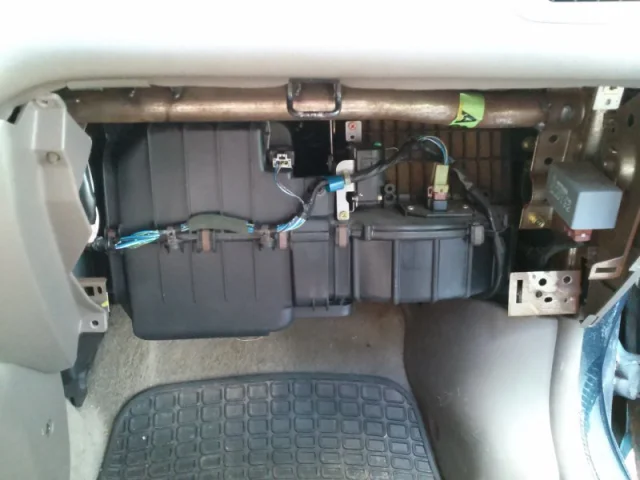
Disconnect the evaporator thermometer connector and remove the wiring harness clips.

Remove the four screws. You can either use a Phillips screwdriver or a 10mm socket. Two at the top and two on the bottom.
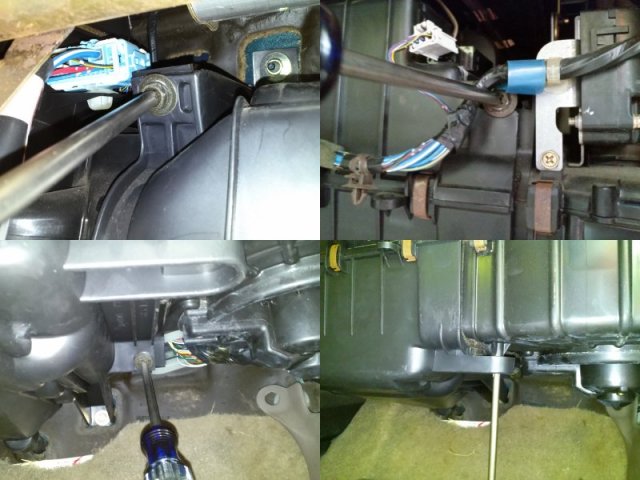
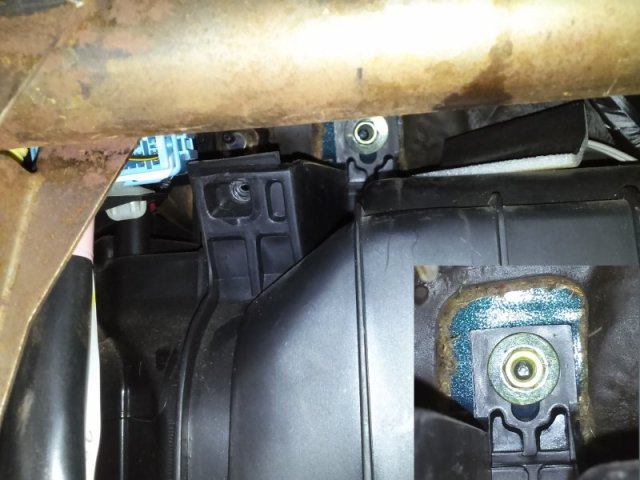
Disconnect the evaporator drain hose. Make sure to reconnect it when you’re done or you’ll drip water on your passenger floor. Remove the 10mm bolt.
Remove the 10mm nut. You’ll need the 6 inch extension to reach it.
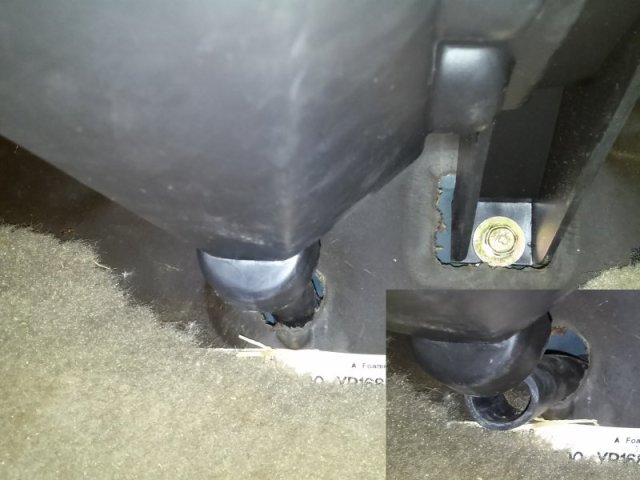
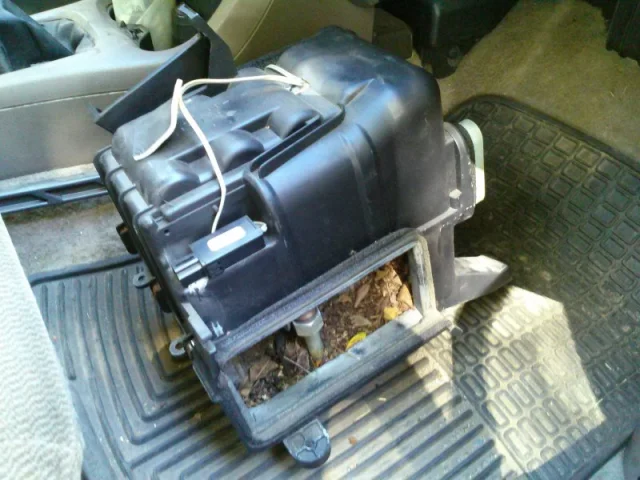
Pull the evaporator case back and down.

The wiring harness will want to get stuck in the upper left corner.

And now the evaporator is out! Time to go to the workbench.
Remove the thermometer from the evaporator. Just pull out.

Remove the two screws from the case by the line connections.
Remove the spring clips with a flathead screwdriver.

There are two on one side and three on the other.

There are seals around the air inlet and outlets. I just cut slits in them where the case separates. It shouldn’t cause any issue.

Separate the two halves of the case. Be careful with the foam insulation.
Remove the evaporator.

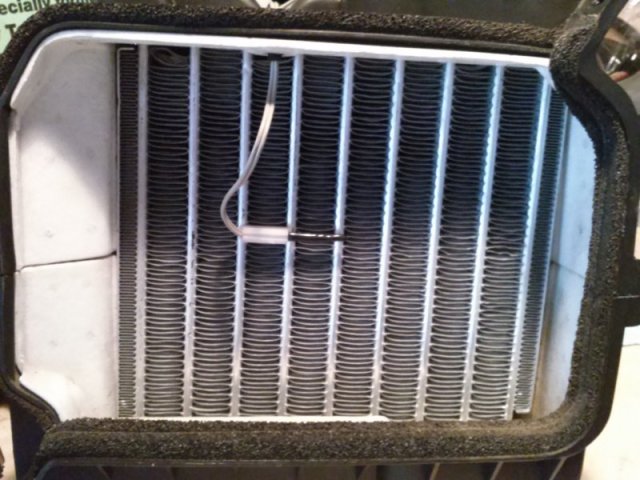
Old evaporator removed. There’s a lot of leaves and other plant remains caked onto it because there’s no air filter on this car.

Time to get the new evaporator ready.

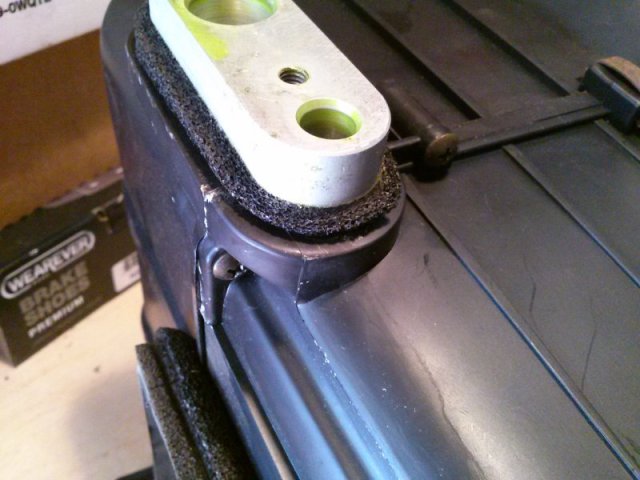
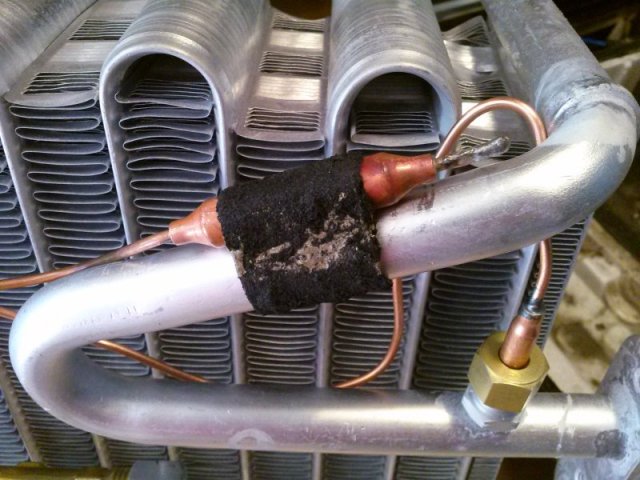
Make sure you put O-rings on the lines where the valve connects.

If you’re installing a new valve, be careful bending the lines so you don’t kink them.

The sensor bulb is held onto the evaporator line by a metal clip. You can buy a new one, or dig the old one out of the foam insulation wrapped around it.

Install the clip.
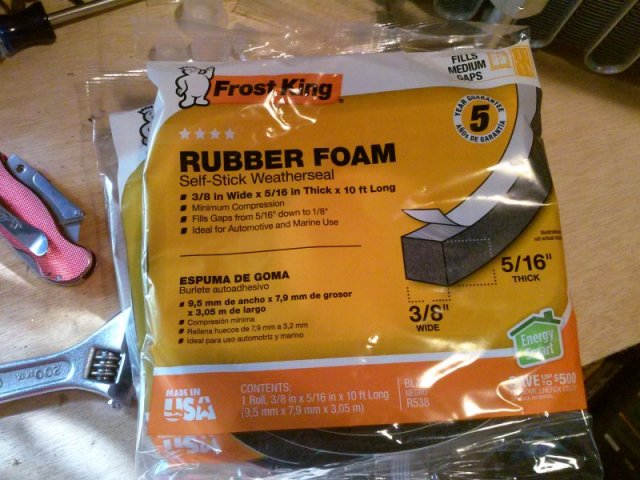
The A/C line connections need a new seal around them. You can buy one, or go to the local home improvement store and pick up some self-stick weatherstripping. This is the size I bought, which was a little thick, but it got the job done.
One strip goes around the inlet/outlet block.

A wider piece goes over the top pipe here.

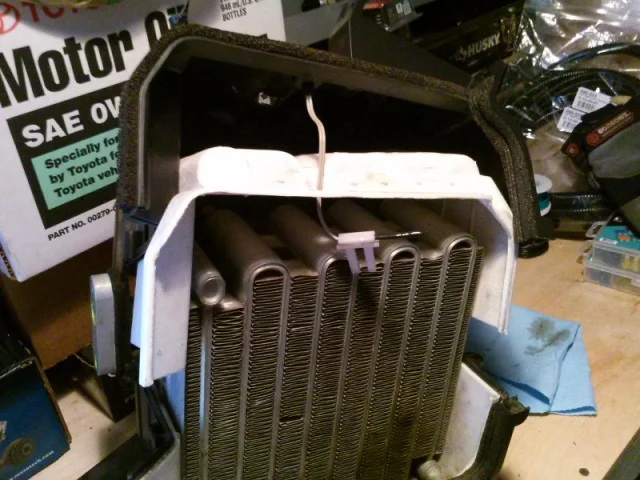
The sensor bulb needs to get wrapped in foam as well. Again it was a bit thick, but it should work fine. You can buy the proper foam piece as well.

Carefully put the evaporator back in the case and put the case back together. The thickness of the foam I’d put on parts made it a tight squeeze.

Screw the two screws back in and install the five clips.
Stick the thermometer into the fins of the new evaporator at the same place you took it out of the old one.
And now we’re ready to put it back in the car!
Install everything in the reverse order that you took them out.
- Put the evaporator case back in, secure with the bolt, nut, and four screws.
- Reconnect the evaporator drain hose.
- Reconnect A/C lines, with new O-rings.
- Reinstall battery.
- Reconnect the thermometer wiring connector, attach the wiring harness clips.
- Install the glove box and frame with the three bolts.
- Install the left brace with the nut and bolt.
- Install the right brace with the two bolts.
- Reattach the left side trim with the two screws.
- Install the right side trim.
- Bring glove box back into regular position.
- Recharge refrigerant.
If you completed this repair, good for you! It takes a bit of time, but it’s worth it to have working air conditioning.
I’ll write more of these step-by-step instruction posts as I come across projects that I think deserve these, but they hopefully won’t be this long.
New blog posts every Monday and Thursday, plus pictures throughout the week on Facebook, Twitter, and Instagram!
-Dan

Pingback: My Car: Plans for 2016 | Mechanical Malarkey
I have 1997 honda civic iwant to clean my rvaporator if remove the evaporator if i rmove the evaporator the a/c gas is leaking? Tnanks
LikeLike
If you’re removing the evaporator, you have to disconnect the lines, so first you have to have the refrigerant removed by a qualified mechanic.
LikeLike
THANKS SO MUCH FOR THIS. I had a gut feeling the valve was what failed on my ac unit and this tutorial’s pictures and to the point text made replacing it easy. The only thing I did extra was add some of AC lube to the o-rings before installing. I had a used can of 134a sitting around and dabbed some oil off that. (I was unsure of oil compatibility issues) Anyways, I filled it back up and am thrilled to feel cold air again.
I did not have the ac unit vacuum pumped before filling. I was concerned what would happen but it seems to be running just fine.
LikeLike
Glad I could help! I wasn’t sure how many people would ever actually need these instructions on such an old car.
LikeLike
You have done great job by providing great step by step instructions to do this job for old car
Thank you
LikeLike
Thank you!
LikeLike
Thank you very much Dan. This is the best post on this topic. Better instructions than any video clip. Applies to all Honda civics 1992-2000 and Acura el 1.6 1997-2000.
LikeLike
Thanks for the details and instructions. Curious, where the A/C lines behind the battery connect, is there a gasket? I see evaporator core gaskets that look the same shape but I didn’t see one on mine. And reason for replacing my evap core is because I drilled a hole right into trying to make a hole for power for wiring sub woofers. Very very dumb mistake. Anyways thanks for the info and hope to hear back. I do have a 97 civic D16 1.6 Liter Vtech
LikeLike